The Something Spunky RLV Stripper–Instructions
RLV Strip Scripts are great fun, but, as anyone who loves and uses them will know, they aren’t perfect.
Everyone hates having to take — for example — shoes off, one component at a time, and it’s a real drag — particularly now we use multiple alpha layers with meshes and shoes — that all clothing layers come off at once. And, of course, the menus can only ever give you the name of the layer or attachment, not what the item is actually called.
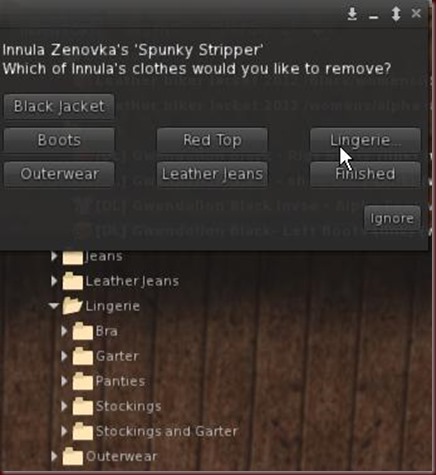
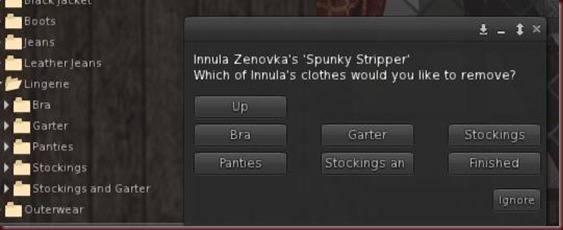
Which would you rather have (both sets of menus represent the same outfit)?
Menus like these
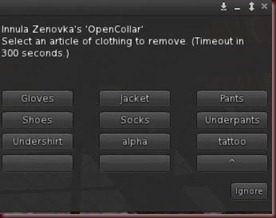 |
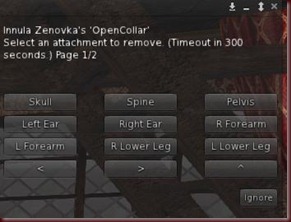 |
Or menus like these:
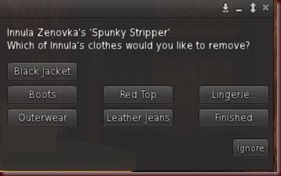 |
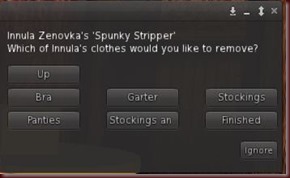 |
Something Spunky is proud to present a new form of stripper, which uses RLV’s “shared folders” feature.
Advantages include:
- Take off items or groups of items (e.g. a mesh and its associated alpha) while leaving other items on the same layer or attachment point untouched.
- Assign meaningful names to items (e.g. “blouse,” “bra,” “jeans”) and use these on menus and (optional) user-configured emotes.
- Multiple, self-configuring, menu Levels — click a button for lingerie to open a new menu with all items grouped.
- Configurable access levels — owner only, access list, open access and ask the wearer.
- Blacklist facility, so it ignores people you don’t like.
- Optional emotes, configured by the user.
- Easy integration with existing scripted toys and traps.
NB These scripts work with all recent versions of RLV/RLVa. Supported viewers include Marine’s RLV, Firestorm, Catznip, Dolphin, Exodus, Niran’s, Singularity and Cool VL.
They will not work in Imprudence or Phoenix. If you use either of these viewers, please either change to a more recent viewer or don’t buy this product.
General.
The kit comprises two items: a hud, Spunky Hud, which acts as the main control unit, and an invisible wearable attachment, Spunky Stripper, which handles the actual stripping and which people can touch try to bring up the menu.
You keep a single instance of the Spunky Hud, which is the brains and memory of the stripper, in one folder, in your main #RLV folder, and you keep a separate copy of the touchable Spunky Stripper attachment with each outfit you use.
Set Up
This requires some set up, but it only needs doing once for each outfit.
It might look complicated but it really isn’t.
The general idea is that you decide with groups of items should come off together, and put them in together in folders with meaningful names. The script uses the folder names to make menu buttons and, when you click, or someone else clicks, the appropriate menu button, all the contents of the corresponding folder are removed simultaneously.
So, for example, if your boots are made up from a shoe to shape your foot, an alpha layer, and attachments for your left and right feet and lower left and right legs, you will probably want all those 4 attachments, the foot layer and the alpha layer, all to come off at once. So you would group them together in a folder called “Boots”.
Then when someone clicks the “Boots” button, they will all come off together, leaving alone any other alpha layers you may be wearing.
Similarly, if you have several different items all occupying the same clothing layer or attachment point, these scripts will take off only the ones in the appropriate folder.
So, first of all, put together an outfit you want to use with the Stripper, and think about what components need to be removed as a group and what folder name (which will be used for the menu button) you want to give each group of items.
When you have done that, here are the detailed instructions.
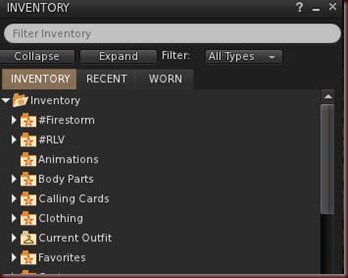
1) If you have not already done so, create a folder at the top level of your inventory called #RLV.
2) Inside #RLV, create a folder called .protected (nostrip). Place the item Spunky Hud inside this.
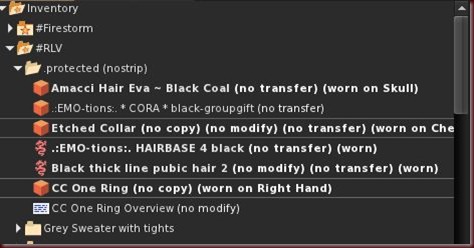
You can also place inside this folder other items you don’t want RLV to be able to remove (hair, tattoos, physics, jewellery etc). These need to be original items (that is, not links to them — other folders in #RLV can hold links, but not the (nostrip) folders). This isn’t necessary for the hud to work properly but it’s a good idea, since it means all traps and strippers will leave your hair and stuff alone from now on.
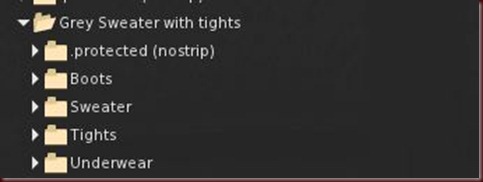
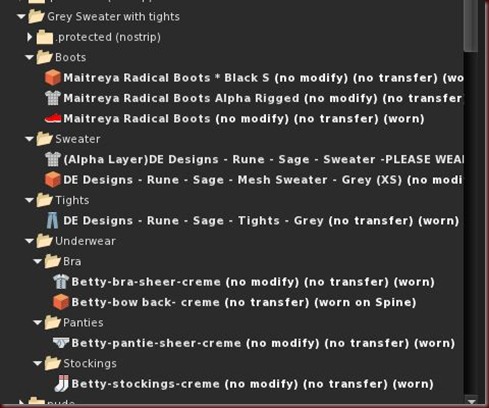
3) Create another, separate, folder, under #RLV, to hold the outfit you want use with the stripper. It can be directly under #RLV or in a subfolder within #RLV. Give it any name you want — it’s just so you can identify the outfit. In this example, the outfit is called Grey Sweater..
4) Inside this folder, create sub-folders. These subfolders can either contain particular items or groups of items to take off together (e.g. the mesh sweater and corresponding alpha layer in the “Sweater” folder and the mesh boots, shoe shape and their alpha in the “Boots” folder) or to hold groups of related items (e.g. the Lingerie folder, which holds sub-sub folders for particular items).
You can either put copies of items into them, if the items are copiable, or you can use Paste As Link if they’re not (you may need to enable this somewhere in your viewer’s preferences).
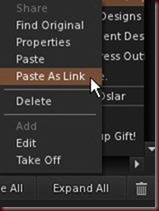
5) The script uses the folder names to create menu buttons (and to create multiple pages if necessary).
6) As well as these sub-folders, create a separate .protected (nostrip) folder inside the outfit folder. Inside this place the object Spunky Stripper. This is an invisible tube, worn on the Spine (though this can be changed) which people can touch to bring up the menu (if they are authorised to use the menu, of course). It has to be in the same folder as the clothes it controls, so it knows what outfit it’s looking at, so you will need to keep a separate copy of it in each outfit.
Simply wear the contents of both the main .protected (nostrip) folder that contains the Spunky Hud and your hair etc, and also (using Add to Outfit) the whole folder containing your chosen outfit (“Grey Sweater with Boots” in this example).
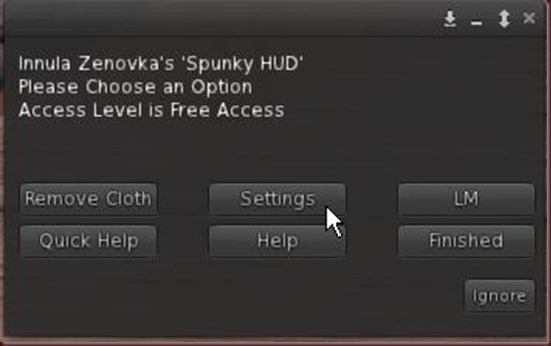
You should see the Spunky Hud button at the bottom left of your screen (it can be moved anywhere).
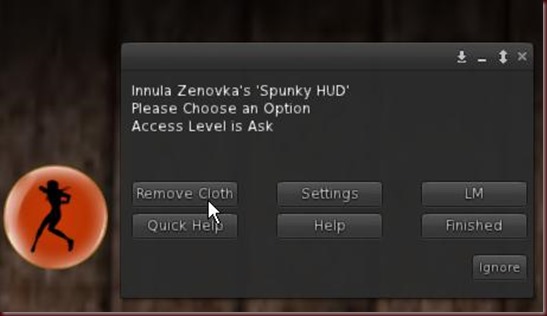
Check that all is working by clicking the hud and then choosing “Remove Clothes” from the menu.
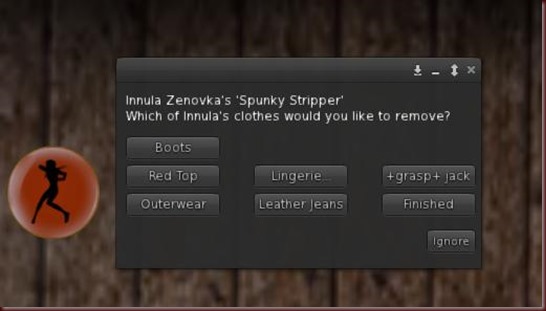
This should bring up the menu that other users will see
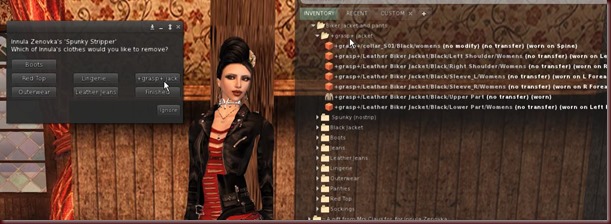
Clicking on one of the top-level buttons (“+grasp+ jacket”, “Boots”, “Leather Jeans”) removes all the items in that folder, leaving other items untouched. So if you remove Innula’s boots, the shoe item, the mesh boots and the boots’ alpha layer all come off together, leaving her other alpha layers untouched. Once an item has been removed, the corresponding button vanishes from subsequent menus until the item is replaced.
Clicking the “Lingerie…” button opens the lingerie sub-folders.
The Spunky Hud in detail
Access Levels
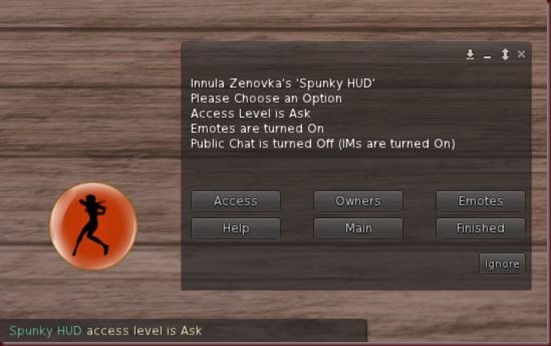
The stripper has three access levels (besides off) and the hud changes color to indicate what level is set.
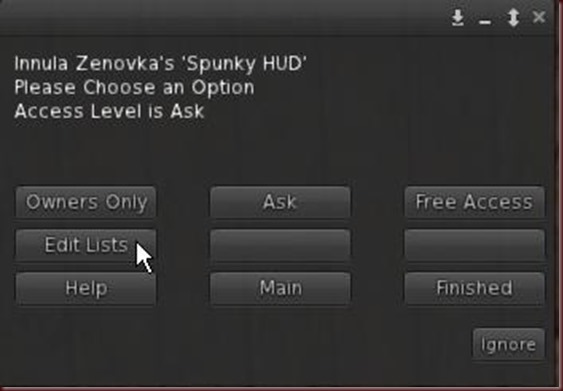
You can change these by clicking “Access” on the main hud menu. This brings up the Access submenu.
The Access Levels are:
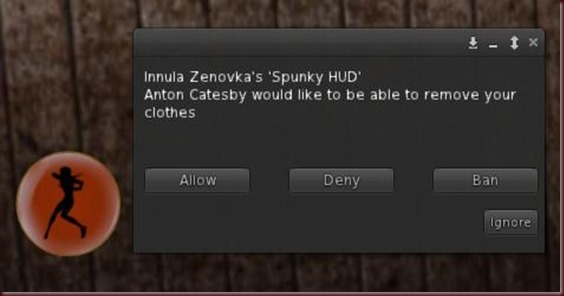
Ask (Orange button).
This is the default level.
This means that you and people you have specified as having permanent access may operated the stripper. Other people may click the stripper and you will be presenting with a menu asking if you will allow them access or not.
If you grant them access, then they may use the stripper without your being asked again, in this session and subsequent sessions when the hud is set to “Ask” (that is, they can’t access it when it is set to “No Open Access”).
You can deny them access. You can also, if you wish, Ban them from using the stripper. It will remember this and deny them access (including when the device is being accessed by traps and the like) until you remove them from the list.
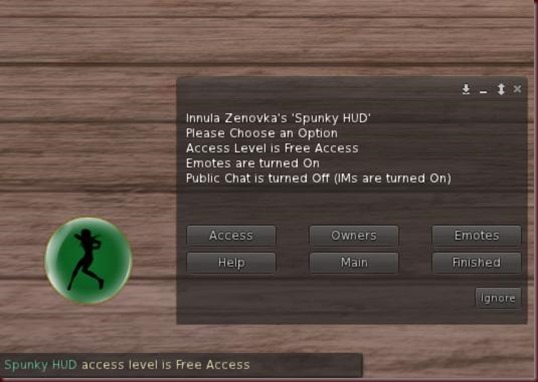
Open Access (Green Button)
Anyone who is not banned may use the stripper without asking your permission.
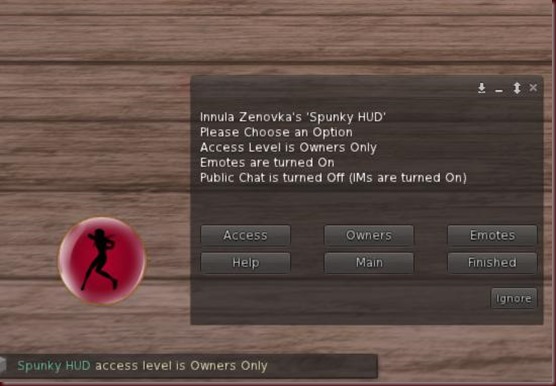
Owners Only ( Red button)
This means that only you and people you have specified as having permanent access (“Owners”, like in collars) may operate the stripper.
Emotes (optional feature)
NB If there is no config card in the Spunky Hud’s inventory, Emotes are not available, and there is no “Emotes” button on the menu.
You can turn emotes on and off, and also set how they should appear when turned on – in public chat, where everyone in chat range (20.0 meters) can see them or in IMs (only you and the person removing your clothes can see them().
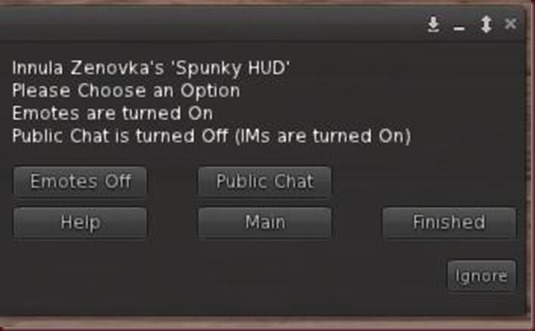
Click the Emotes button on the main menu to bring up the Emotes submenu
The menu (like most of the hud’s menus) is a “smart” one, in that it changes the buttons according to what options are available. In the illustration above, Emotes are turned off and, if they are turned on, will be on the IMs setting.
When they are turned on, anyone removing your clothes is given an Emotes menu after they’ve chosen an item to remove:
Adding and Removing Owners
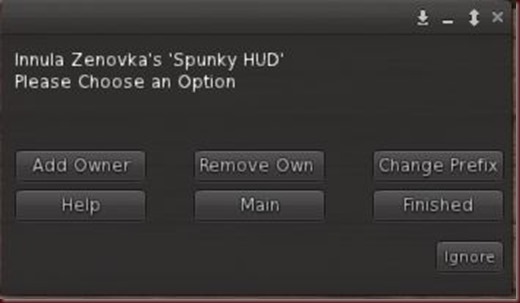
This can be accessed from the Settings>Owners button
“Owner” here is used to mean someone who is on the list to access the stripper at all times when it’s turned on (like owners of a collar). Add Owner and Remove Owner do what you would expect. Former Owners are not notified when you remove them from the list.
The Prefix and Changing It
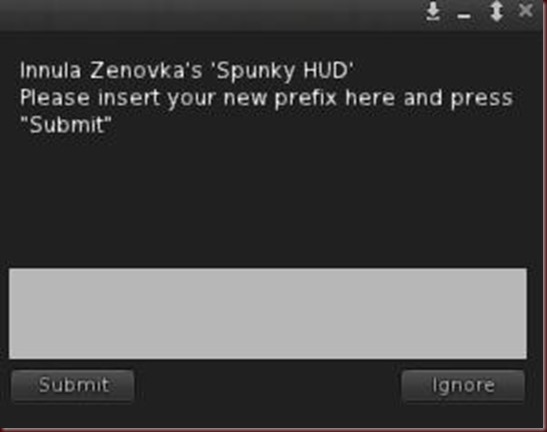
The owner, and anyone on the access list, can invoke the menu by saying the owner’s prefiix, plus “menu” on channel 7. By default, your prefix is the first letter of your first and second names (like a collar) if you have a two word name, or the first two letters of a single name account. So it’s izmenu for Innula Zenovka or hfmenu for helenafaustina. The prefix can be changed by using the Settings>Owners>Change Prefix menu button and entering the new prefix in the text box.
Removing Users
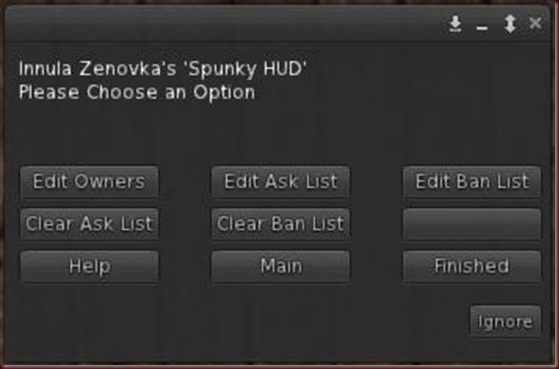
Users are people who have been given temporary approval when they’ve asked to use the stripper and you have agreed. Clear Ask List clears it, and Edit Ask List lets you remove individuals. The Ban list can be cleared or edited in the same way.
Both options are available from the Settings>Access>Edit Lists button
Writing your own emotes
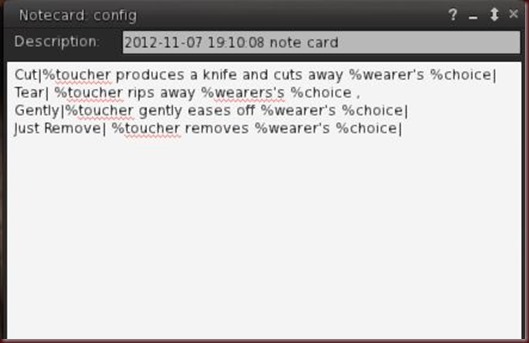
The syntax for Emotes is
Button Label|emote|
Emotes can use three keywords, %toucher, %wearer and %choice. This means that, when the item is in use, the script replaces %toucher with the full name of the person using the menu, %wearer with the first name of the person being stripped, and %item with the name of the item.
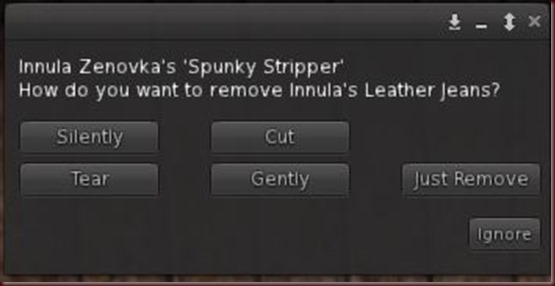
Thus, if Vesta Martynov chooses “Cut” when removing Innula Zenovka’s jeans, and the text in the config card is
Cut|%toucher produces a knife and cuts away %wearer’s %choice|
the emote will be
Vesta Martynov produces a knife and cuts away Innula’s jeans
“Silently” is added as an option automatically. If “Silently” is chosen, there is no emote.
Scripting Reference
For the ease of people wanting to make scripted traps or to write plug-ins enabling collars etc to interact with the RLV Stripper, the hud listens on a special channel, calculated as
25+ ((integer)(“0x”+llGetSubString((string)llGetOwner(),-8,-1)) & 0x3FFFFFFF) ^ 0xBFFFFFFF;
If it receives a message on that channel, comprising someone’s UUID then, provided the UUID is not that of someone on the item’s banned list, it will automatically give a menu to the person whose UUID it has been sent, provided that
- It is turned on (naturally) and EITHER
- The message is sent by something the owner is wearing (e.g. a collar), OR
- The message is sent by a script in the root prim of something on which the owner has been force-sat by a relay using @sit and locked onto with @unsit=n.
For added convenience, when the hud, which listens for confirmation messages from the owner’s relay, hears the appropriate confirmations, it says, using the special channel and llRegionSayTo, the wearer’s uuid to the object on which the owner is seated.
So if an RLV trap calculates the channel and opens a listener when trying to trap someone, if it hears the uuid of its victim as soon the victim is locked in, it knows it can give the victim’s clothes menu to other people.

Leave a comment