How to Install the MLPV~RLV Add-On

1. Check to make sure your object has the right engine This Add-On will only work with items using the MLPV engine.
If your item uses MLP, it can be easily upgraded to MLPV. If your item uses another system, then this will not work. The MLP/MLPV Engine is the scripting that allows a furniture piece to rez poseballs and generate menus. If your item does not rez poseballs, you know for sure it’s not MLP/MLPV. If your Item does rez poseballs from a menu, then it may be MLP/MLPV.
The easiest way to tell if your item is using an MLPV-based engine is to start it up and then click it to get a pop-up window. The first menu window that comes up should tell you the version of the MLPV engine (If it’s an MLPV). If your item says MLPV2.0 or higher, you have an MLPV and you’re all set.
|
|
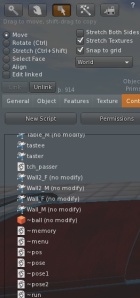
If this doesn’t work for some reason, you can always look inside your object. Just click it, pick edit from the pop-up menu, and then go to the contents tab on the editing window. Look at the items in the contents window. You should see, among other things, notecards that say .MENUITEMS, .POSITIONS, as well as scripts that say ~poser.
If your item is a plain MLP, then you need to upgrade to MLPV, following the simple instructions at this link.
2. Prepare your item for easy installation.
Rez the box entitled MLPV~RLV Add-On, Open it, and save the contents to inventory. (Click the item, choose Open from the pop-up. Look in your Recent Items in your inventory to find the items you just added to your inventory.)
Click on the MLPV item you are upgrading and then choose Edit, then go to the Contents Tab of the Edit Window. Locate a script in your Recent Items called MLPV~RLV Receiver Script and drag it into the Contents Tab of the MLPV item you are upgrading. Once you see the script in your Contents Tab, your item is ready for installation.
3. Installation
Look in your Inventory for an item called MLPV~RLV Add-On Installer Click this Installer and rez it by dragging it to the ground near your MLPV object to be upgraded. It should look like this….
Now Touch it by clicking on it, and the installation process should begin. The Installer will tell you when the process has finished.
4. Restart your MLPV Item
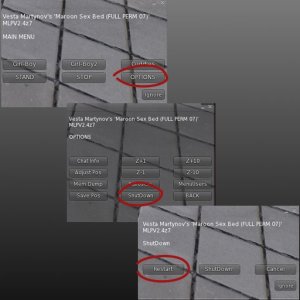
To Restart your item, just click for a menu, then choose Options, then choose Shutdown, then choose Restart. This can take a few minutes.
5. Try it out!
Click your MLPV item to start it if it hasn’t started yet. Click again to get a menu.
You should now see an RLV Options Button in the menu.
For more information on using your new RLV enabled item, please visit the Directions Page.


